Thursday, October 28, 2010

Artist Profile: Tazwell

I bought this piece for my Mom a few
years ago for her birthday.
I met Tazwell through a friend.  He does a variety of work in both 2-dimensional and 3-dimensional mediums.  I am most enamored wish his clay work.  I am a complete sucker for original art, but I can't buy often.  For hand crafted pieces of this quality, his work is very affordable.  

Very cool random fact about Tazwell, he designed an Auburn University school flag which was left on the moon, so he is the only American artist with work on the moon.

Tazwell is represented by his daughter (Meg McGovern).  You can browse his work online and contact Meg for pricing or to order.

Wednesday, October 27, 2010

Design Resource: Country Living

My favorite magazine right now is Country Living.  Country Living has a great mix of accessible, DIY-type projects and aspirational makeover designs.

I was privileged to attend the first Southern Country Living Fair in Stone Mountain, Georgia this weekend.  It was great to meet all of the artisans and craftspeople selling at the show.  It was also amazing to meet Sarah Gray Miller, the editor of Country Living.  She is exactly like her magazine--warm, friendly and personable.

Being at the fair inspired me to try some new projects.  It also inspired me to start featuring some of my favorite artists and craftspeople from time to time.  Stay tuned!

*Bonus:  Here's my geek out moment of the week!  I also happened to be in the right place at the right time to meet Valerie Tripp!  She wrote many of the American Girl books (I read all of them as a kid), and she is one of the people that inspired me to want to write.  What a treat!

Tuesday, October 26, 2010

How-To: Cross-Stitch Monogramed Tea Towel

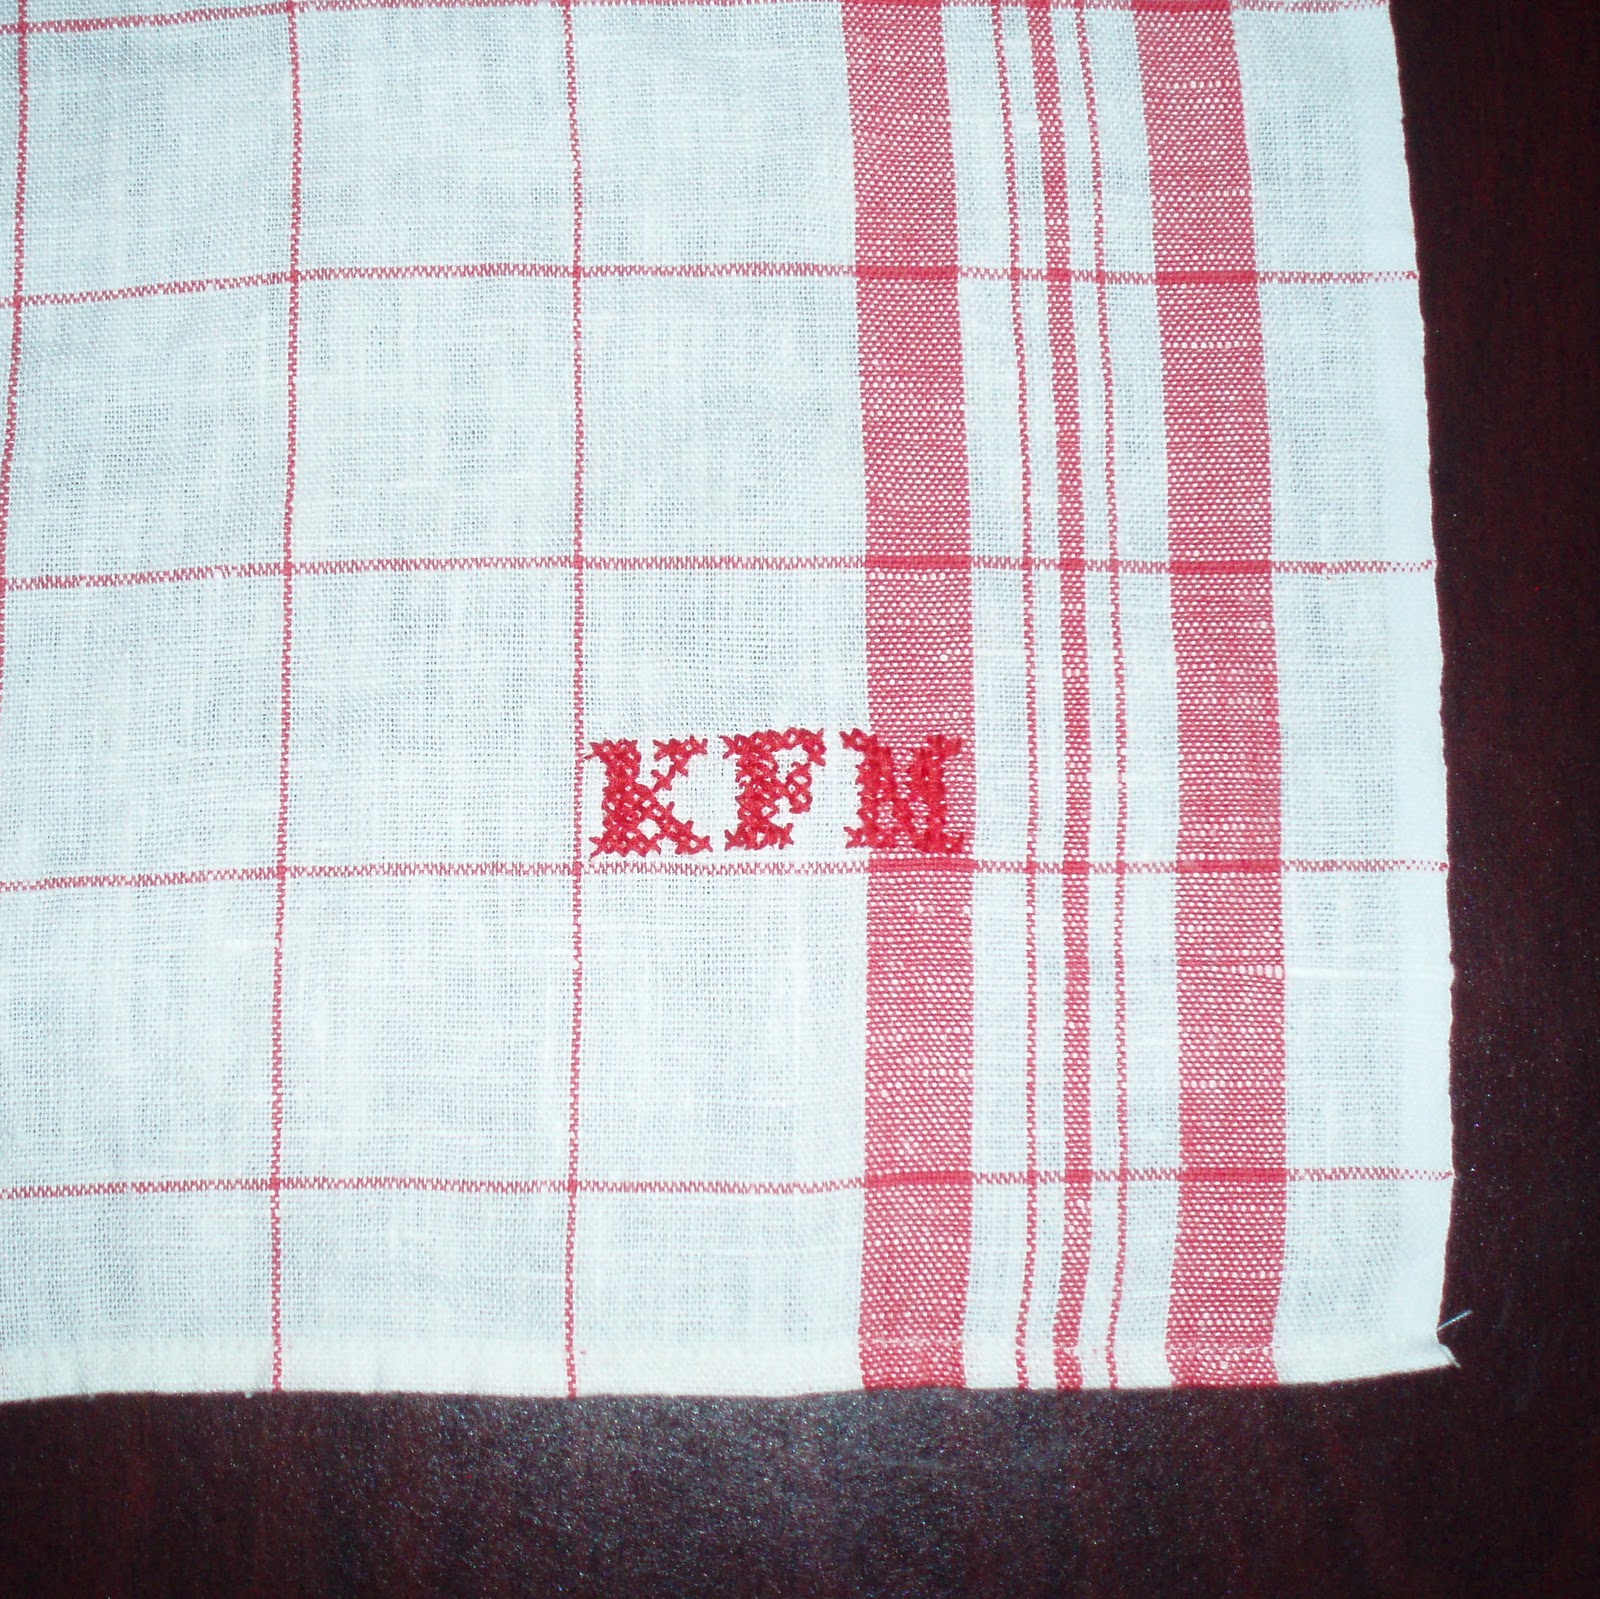
I love the ordered look of a cross stitched monogram on tea towels.  With a simple trick, you can easily recreate this look.
Step-by-Step


1.) Cut a length of embroidery floss.  Split the fibers into two sections of three fibers each.  Thread the needle with one of the sections and knot the end of the floss to keep it from slipping through the fabric.


2.) Place the inside ring of an embroidery hoop on the table.  Lay the tea towel down on top of the hoop.  Place a square of cross-stitch canvas on top of the tea towel.  Slip the outside ring of the embroidery hoop over the two layers and tighten the screw.
*Tip: If you are using a towel with a geometric pattern, hold the hoop up to the light and align the weave of the cross-stitch canvas with the pattern of the tea towel.

3.) Use a counted cross-stitch pattern as your guide to stitch your initials.
*Tip: You can find lots of free cross stitch alphabets online.  I used this one.

4.) Remove the assembly from the embroidery hoop.

5.) Trim off the excess cross-stitch canvas.


6.) Unravel all of the fibers of the canvas until you are left with only the stitches.

Monday, October 25, 2010

Design Resource: It's Free!

I'm very happy to unveil the latest edition of Lowe's Creative Ideas for Home and Garden, which I was privileged to work on.  (The cover was styled by yours truly, and I must say that I am very happy with the result.).  What I really want to tell you about though is that you can receive your very own copy of Lowe's Creative Ideas for Home and Garden in your mailbox every other month for free!  Just sign up here.

Friday, October 22, 2010

Giving Back: School Pride

I would love to have the opportunity to do non-profit design for a living, and so I have long been a fan of Extreme Makeover: Home Edition.  NBC premiered School Pride last Friday.  It's essentially Extreme Makeover: School Edition.  It's got promise, and I'm looking forward seeing more.  The second episode airs tonight at 8/7c.  Here's the pilot if you missed it:

Thursday, October 21, 2010

Frivolity: Saturday Breakfast Never Looked So Good

I've got a really cool dad.  (Check out his artwork!)  I like to find out about other cool, creative dads too!  "Just trying to make so cool pancakes for my daughter," is the tagline for Jim's Pancakes... mission accomplished.  Jim makes creative pancakes for his 3-year old daughter Allison, and we're not just talking Mickey Mouse heads.  Take a look at some of his creations!

Tuesday, October 19, 2010

Christmas Challenge

A couple years ago we made my dad a
Muppet dad for Christmas.  We even used
his favorite shirt and some toddler Converse!
I know what you're thinking.  It isn't even Thanksgiving yet!  (I've been working on Christmas stuff at work since January though.)  Also, this will take some advance notice to pull off.  I am challenging myself this year.  I am going to make my Christmas presents this year and donate the money that I saved to charity.  I'll try to keep you posted on my progress, but some of the people that I'll be gifting read this (Hi Mom!), so I won't be able to show you everything.  Let me know if you want to take the challenge!  I'd love to hear your ideas!

Monday, October 18, 2010

Design Inspiration: Office Party

Publishing is kind of a volatile industry right now.  I just moved into my fourth job title and fourth cubicle in a little less than two years at the same company.  (Hangin' on like a leech baby!)  I have been searching for some inspiration for decorating my new cubicle, so I thought that I would share some of my favorites with you.

Aspirational


Etsy Headquarters
My career goal is to someday have a door.  These are really cool doors.
Google
Inventionland 1
Inventionland 2
Pixar 1
Pixar 2


Inspirational


Frivolity


I want a ball pit in my cube.


PS: There's even a web show on the subject.

Friday, October 15, 2010

How-To: No-Mess Pumpkin Decorating

Last year I carved my first pumpkin.  Sticking you hand inside a pumpkin feels like shoving your hand up a giant's nose.  I decided to go a different route this year with a less-messy, apartment size version.   A pumpkin will last a long time if you don't cut it.


Step-by-Step
1.) Sketch your design on the pumpkin using a dry erase marker.  You can wipe off and redraw your design until you are happy with it.

2.) Trace over your design with a permanent marker.

Thursday, October 14, 2010

Tool Box: No Really, it Works

I have been searching for a mid-century modern sofa to replace my roadkill* couch for the past two years.  I almost caved and bought this one at Macy's, but someone wouldn't let me waste my money.  (Thanks Mom!)  I found a fabulous vintage sofa at an estate sale a few weeks ago for, wait for it... $30!!!.

The only problem with it was that the previous owners had a bunch of small dogs, and they liked to scratch up the upholstery.  Until I can afford to have it recovered, I had to find a way to remove the pilled-up fibers on the seat.  After trying a couple different things, I found that the most effective tool is a cheap Bic razor.  I used a twelve pack on my couch, and while it's not perfect, it looks so much better.  See?
Before

After


*Roadkill is the stuff that you find on the side of the road in other people's trash piles or out next to the apartment dumpster in college towns at the end of the semester.

Wednesday, October 13, 2010

How-To: Stripes

Before
After

After
After


After


After


As a renter, I am always looking for a way to transform my bland, beige walls without painting.  Inspired by the success of my door project, I decided to take a stab at striping my bathroom walls.  I am particularly excited by the result.

*Tip: I tested the tape on my wall to make sure that it wouldn't destroy the paint.  The paint on the walls of my bathroom is a high gloss.


Step-by-Step 
1.) Gather your supplies:
Xacto knife
Pencil
Ruler
1 1/2" Electrical Tape (I used 4 rolls.)
3/4" Electrical Tape (I used 2 rolls.)

2.) Using a ruler and pencil, measure and mark the location of the stripe at both the top and bottom of your stripe.  (I chose to leave 1 inch between my stripes and alternate between the wide and skinny tape.)


3.) Start at your top mark and apply the tape in a stripe down the wall until you reach the lower mark.  

Tip: Be sure to allow the tape to relax before applying it.  If you stretch it, it may shrink back up later.

4.) Use an Xacto knife to trim the stripe off of the roll.  Repeat until you have filled your desired area.

Tuesday, October 12, 2010

Giving Back: Project Linus


I am super excited that it is almost time to break out "It's the Great Pumpkin Charlie Brown."  I'm also super excited about the charity that I just found called Project Linus.  Project Linus' mission is to provide love, a sense of security, warmth and comfort to children who are seriously ill, traumatized, or otherwise in need through the gift of new, handmade blankets and afghans lovingly created by volunteer "blanketeers." I'm going to have a go at making a blanket or two myself.  I'll keep you posted!

Monday, October 11, 2010

To Be Read With a British Accent

My dear friends,

I have been remiss in my blogging duties of late.  I have but recently fallen victim to unfortunate employment circumstances and rather a nasty cough.  I will endevour to be more disciplined in my scheduled writings.

Do accept my sincerest apologies.

Your devoted servant,

Faith

(I watched a lot of Jane Austen movies during my time in bed.)